A few years ago, I saw a cardboard star for sale and, being a person with a weakness for all things starry, I had to have it. I'm also a person who likes to make things and didn't want to spend 40 dollars on it. Okay, I'm also a person who's cheap. The first star I made is white and sits on top of the bookcase in my living room. I made tons of mistakes on it, but I still love it. Since then, I've made some for sale in my Etsy shop and for family members. This star is for my sister-in-law, her color request was bronze. I'm not a huge fan of brown, so I was worried that it wouldn't be pretty. The paints at the craft store labeled bronze, all looked copper to me, too orange, so I picked metalic espresso. I couldn't be happier with the results.

This is an 18 point Moravian Star. I trace around my template onto tagboard. These cardboards come in boxes of individual cream cheese packets at my job in the bakery. They would be going into the recycling, but I recycle them into stars, instead. They're the perfect thickness and are already white.
I traced 8 with the triangle notch and 10 without.
Here's all my pieces traced, this size fits 2 on a cardboard. On some of them, I traced smaller ones for another star. I try to put as little as possible into the recycling.
This paper trimmer took so much stress off my hand. Tagboard is easily cut with scissors, but your hand can hurt after cutting this much at a sitting.
All the pieces cut, ready to turn over and use the scoring blade for every fold line. The paper trimmer made this job a lot faster and easier, too.
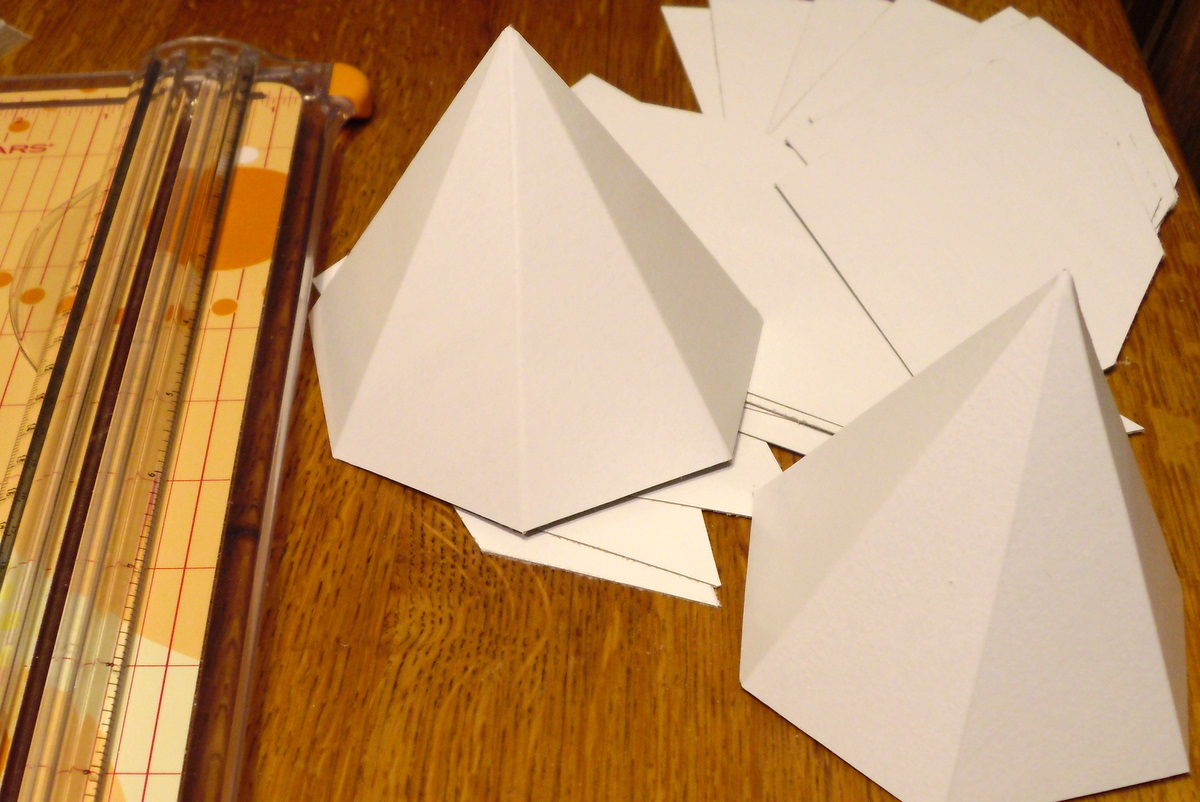
Here's the first 2 scored and folded. So much more accurate than I was folding them.
I rebend a Christmas ornament hanger and hot glue it into the top point. You don't have to hang them, but they're very light-weight and I like to have that option. It'll sit on a shelf with the hanger out of the way, just as easily.
I run a bead of hot glue down the edge, fold in half to join and then hold it in a square position for the 10 seconds it takes to cool.
I forgot to take a picture of them all in points. They look like a giant campground, 18 tents all lined up. I glue 4 points with triangles around 1 without and repeat for the other side. Then glue the other 8 lined up around 1 half. This picture's of the 2 halves and starting to glue the ring of points onto the left half. You can see, I was testing the paint on it. Then join the 2 halves, being careful to line them up correctly. It takes some finessing, accuracy at every step, helps.
As I was holding and gluing, I thought,"What if I'm squeezing too much into this seam and it drops through onto my other hand?" A split second later, I was trying to get hot glue off my fingers. Yowza! 6 hours of holding an icepack later, I decided, next time, to have a bowl of ice water on the table. Just in case.
The metalic paint I bought, didn't cover the white very well, so I base coated it in a warm brown. Actually, Camille painted it for me. She wanted to paint and I was still holding that icepack. Great job, Camille!
The next day, when that coat was dry, I painted each plane with the metalic brown and sprinkled the glitter on the wet paint
I think she's going to love it. Wish I was a better photographer. This picture really doesn't do it justice. Much prettier in person.